
Exterior House Painting Services A Comprehensive Guide: Transforming your home’s exterior is more than just a cosmetic upgrade; it’s an investment that protects your property and enhances its curb appeal. This guide dives deep into every aspect of exterior house painting, from initial preparation and paint selection to choosing the right professionals and maintaining your stunning new look for years to come.
We’ll cover everything you need to know, whether you’re a seasoned DIYer or planning to hire a contractor.
From understanding the cost factors and budgeting effectively to exploring various painting techniques and addressing common paint problems, we’ll equip you with the knowledge to make informed decisions. We’ll also showcase real-world examples of successful exterior painting projects, inspiring you with fresh ideas and practical solutions. Get ready to unlock the potential of your home’s exterior!
Introduction to Exterior House Painting
Your home’s exterior is its first impression, and a fresh coat of paint can dramatically enhance its curb appeal and protect it from the elements. Professional exterior house painting isn’t just about aesthetics; it’s a crucial investment in preserving your home’s value and longevity. Neglecting regular maintenance can lead to costly repairs down the line, making professional painting a smart, long-term strategy.Regularly scheduled exterior painting offers numerous benefits beyond improved appearance.
A fresh coat of high-quality paint acts as a protective barrier against harsh weather conditions like sun, rain, and snow, preventing damage to the underlying wood or siding. This protection extends the lifespan of your home’s exterior, reducing the need for expensive repairs or replacements. Furthermore, a well-maintained exterior can significantly increase your home’s resale value, making it a worthwhile investment even before considering the aesthetic improvements.
A well-painted house simply looks better, creating a more welcoming and attractive environment.
Factors Influencing the Cost of Exterior House Painting Services
Several factors significantly influence the overall cost of professional exterior house painting. These factors should be considered when planning your project and budgeting accordingly. Understanding these variables allows for more accurate cost estimations and helps you make informed decisions about your painting project.
- House Size and Complexity: Larger houses with intricate architectural details or multiple stories naturally require more time and materials, increasing the overall cost. For example, a two-story Victorian home with elaborate trim will cost considerably more than a single-story ranch-style house.
- Surface Preparation: The condition of your existing paint significantly impacts the cost. If extensive scraping, caulking, or wood repair is needed before painting, the labor costs will increase. Houses with significant damage, such as peeling paint or rotting wood, require more extensive preparation, driving up the price.
- Paint Quality and Type: High-quality paints, while more expensive upfront, offer superior durability and longevity, reducing the need for repainting in the near future. The type of paint also matters; paints designed for specific materials (e.g., wood, stucco, brick) may cost more but provide better protection. For instance, a premium acrylic paint designed for wood siding will likely cost more than a standard exterior paint, but its superior performance justifies the extra expense.
- Labor Costs: Labor costs vary depending on location, the painter’s experience, and the complexity of the job. Highly skilled and experienced painters often charge more per hour than less experienced ones. The geographical location also plays a role; labor rates tend to be higher in urban areas compared to rural areas.
- Number of Coats: The number of paint coats required depends on the condition of the existing paint and the desired level of coverage. More coats naturally increase the amount of paint and labor needed, thus increasing the overall cost. Often, two coats are recommended for optimal coverage and durability.
Preparation and Surface Evaluation
Proper preparation is crucial for a long-lasting and beautiful exterior paint job. Neglecting this stage can lead to premature paint failure, wasted materials, and ultimately, a costly redo. Thorough surface evaluation and preparation ensure the paint adheres properly and provides the intended protection and aesthetic appeal.Before even thinking about paint colors, you need to assess the current condition of your home’s exterior.
This involves a detailed inspection to identify any issues that need addressing before painting can begin. This step is as important as the painting itself.
Surface Cleaning and Repair
Effective surface cleaning removes dirt, mildew, loose paint, and other contaminants that can interfere with paint adhesion. Power washing is often the most efficient method for larger surfaces, using a low-pressure nozzle to avoid damaging the siding. For delicate surfaces, a gentler approach with a brush and appropriate cleaning solution might be necessary. After cleaning, allow ample time for the surface to completely dry before proceeding to repairs.
Addressing any cracks, holes, or damaged areas is essential. This typically involves filling gaps with caulk or wood filler, followed by sanding to create a smooth surface. For larger repairs, such as replacing rotten wood, professional assistance might be necessary.
Existing Paint Assessment
Evaluating the existing paint is critical to determining the appropriate course of action. Inspect the paint for signs of chalking (a powdery residue), peeling, blistering, or cracking. These issues indicate paint failure and require addressing before repainting. The level of adhesion should also be checked; gently scraping the paint surface can reveal if it’s firmly attached or prone to peeling.
If the existing paint is in good condition with strong adhesion, a single coat of fresh paint might suffice. However, severely damaged or deteriorated paint requires more extensive preparation, possibly involving complete removal before repainting. For example, if significant peeling is observed, it’s likely that multiple layers of paint need to be removed to ensure proper adhesion of the new paint.
Pre-Painting Inspection Checklist
A thorough pre-painting inspection is vital to ensure a successful project. This checklist will help identify necessary repairs and materials:
- Exterior Walls: Inspect for cracks, holes, peeling paint, mildew, and loose siding. Note the type of siding (wood, vinyl, stucco, etc.) for appropriate cleaning and repair methods.
- Trim and Molding: Check for rot, cracks, and loose pieces. Note the need for caulking or replacement.
- Windows and Doors: Inspect for cracks, peeling paint, and damaged caulking around frames. Note the need for repair or replacement of caulking.
- Gutters and Downspouts: Check for clogs, damage, and proper drainage. Clean gutters and downspouts before painting.
- Other Exterior Features: Examine decks, fences, railings, and other exterior features for necessary repairs or cleaning.
Necessary Repairs and Materials
The repairs needed will depend on the inspection findings. Common repairs include:
- Caulking: Repair cracks and gaps in siding, trim, and around windows and doors.
- Wood Repair: Repair or replace rotten or damaged wood sections.
- Mildew Removal: Treat mildew with a suitable cleaning solution.
- Paint Removal: Remove peeling or flaking paint using scrapers and appropriate solvents.
The materials needed will vary depending on the specific repairs and the size of the project. These typically include:
- Caulk: Choose a high-quality, exterior-grade caulk appropriate for the material being sealed.
- Wood Filler: Select a wood filler that matches the type of wood being repaired.
- Paints and Primers: Choose exterior-grade paints and primers appropriate for the siding material and climate.
- Cleaning Supplies: Include brushes, rollers, drop cloths, and cleaning solutions.
Choosing the Right Paint and Colors
Selecting the right paint is crucial for a long-lasting and beautiful exterior paint job. The choice depends on several factors, including your climate, the material of your house, and your desired aesthetic. Understanding these factors will help you choose a paint that provides optimal protection and enhances your home’s curb appeal.
Exterior Paint Selection Based on Climate and House Material
Climate significantly impacts paint performance. Hot, sunny climates require paints with excellent UV resistance to prevent fading and cracking. Conversely, humid or rainy climates necessitate paints with superior mildew resistance and water repellency. The material of your house also dictates the type of paint needed. For instance, wood siding benefits from breathable paints that allow moisture to escape, preventing rot.
Brick or stucco may require paints with good adhesion to prevent peeling. Consider these factors when making your selection to ensure the longevity of your paint job. For example, a home in a coastal area with high humidity and salt air will need a paint specifically formulated for those conditions, offering superior mildew resistance and protection against salt corrosion.
A home in a desert climate will need a paint with excellent heat and UV resistance to prevent fading and cracking.
Comparison of Exterior Paint Types
Acrylic and oil-based paints are the two most common types used for exterior house painting. Acrylic paints are water-based, making them easier to clean up and generally less odorous. They offer good durability, flexibility, and mildew resistance. Oil-based paints, while offering superior durability and water resistance, require solvents for cleanup, produce stronger fumes, and take longer to dry. Oil-based paints might be preferred for areas with extreme weather conditions or where exceptional durability is needed, such as trim work.
However, the environmental impact and cleanup considerations should be weighed against their benefits.
Exterior Paint Finish Comparison
Choosing the right paint finish is as important as selecting the paint type. Different finishes offer varying degrees of durability, sheen, and washability.
This guide on Exterior House Painting Services covers everything from color selection to choosing the right paint. Improving your home’s curb appeal often involves more than just paint, though; consider also enhancing your property with a new fence, as detailed in this helpful guide on Fence Installation Services Your Guide. Back to house painting, remember proper surface preparation is key for a long-lasting, beautiful finish.
| Finish | Durability | Cleanability | Sheen |
|---|---|---|---|
| Flat | Low | Low | Non-reflective |
| Eggshell | Medium | Medium | Slightly reflective |
| Satin | High | High | Moderate reflection |
| Semi-gloss | Very High | Very High | High reflection |
Painting Techniques and Methods
Professional exterior house painting requires a systematic approach to ensure a durable and aesthetically pleasing finish. Proper techniques vary depending on the surface material, and using the right tools is crucial for achieving optimal results. This section details the step-by-step process and techniques for various surfaces.
The process typically begins with thorough surface preparation, as discussed previously. Once the surface is primed and ready, the painting process itself can begin. This involves applying the paint in a consistent manner to ensure even coverage and prevent lap marks.
Exterior House Painting Process
A typical professional exterior house painting job follows these steps:
- Surface Preparation: This includes cleaning, scraping, caulking, and priming as previously detailed.
- Cutting In: Using a brush, paint a 2-4 inch border around all edges, windows, doors, and trim. This creates a clean line and prevents roller marks from showing.
- Rolling: Apply paint using a roller, working in sections from top to bottom. Overlap each stroke slightly to ensure even coverage. Use a roller extension pole for higher areas to avoid over-reaching and maintain a consistent application.
- Back Rolling: Immediately after rolling, lightly roll over the wet paint again to smooth out any brush marks or roller texture and improve the evenness of the finish. This is particularly important for high-gloss paints.
- Second Coat Application (if needed): Allow the first coat to dry completely according to the paint manufacturer’s instructions before applying a second coat. This provides superior protection and color depth.
- Clean Up: Thoroughly clean all brushes, rollers, and equipment with the appropriate solvent, as specified on the paint can.
Painting Wood Siding
Wood siding requires careful attention to detail. The grain of the wood can affect paint absorption and application. Using a high-quality exterior paint designed for wood is essential for longevity.
For wood siding, a brush is often preferred for detailed areas, such as around window and door frames. Rollers are efficient for larger areas, ensuring even coverage. The back-rolling technique is crucial for achieving a smooth, even finish on wood siding.
Painting Brick
Brick surfaces present a unique challenge due to their porous nature and textured surface. Choosing a paint designed for masonry is vital. A high-quality masonry paint will adhere better and offer superior protection against moisture.
Our guide on Exterior House Painting Services covers everything from prep work to choosing the right paint. However, before you start painting, addressing any underlying issues is key; if you have stucco damage, check out this helpful resource on Stucco Repair Contractors A Comprehensive Guide to ensure a smooth, long-lasting paint job. Proper repairs will prevent future problems and make your paint job look its best.
A sprayer can be highly efficient for painting large brick surfaces, providing even coverage and minimizing brush strokes. However, careful masking of surrounding areas is essential to avoid overspray. For smaller areas or intricate detailing, a brush can be used to ensure precise application.
Painting Stucco
Stucco surfaces are often textured, requiring a paint that can adequately cover the surface without showing brush marks. A high-quality exterior stucco paint will provide the necessary coverage and durability.
Rollers are generally the most effective tool for painting stucco, using a thicker nap roller to accommodate the texture. A sprayer can also be used, but requires careful attention to avoid runs and drips due to the stucco’s uneven surface. Back-rolling is crucial for achieving a smooth finish, especially with stucco’s varied texture.
Proper Use of Painting Tools and Equipment
Selecting the right tools is crucial for achieving a professional finish. Different tools are better suited for different surfaces and paint types.
- Brushes: Choose high-quality brushes with bristles appropriate for the paint type (natural bristles for oil-based paints, synthetic bristles for water-based paints). Different brush sizes are needed for various tasks, from cutting in to detailed work.
- Rollers: Roller covers come in various nap lengths (thickness of the fibers). A thicker nap is better for textured surfaces like stucco, while a thinner nap is suitable for smoother surfaces. Use a roller frame that is comfortable to handle and allows for even paint distribution.
- Sprayers: Airless sprayers are efficient for large surfaces, but require careful preparation and technique to avoid overspray and runs. Always follow the manufacturer’s instructions for setup and use.
- Other Tools: Other essential tools include drop cloths, painter’s tape, putty knives, scrapers, and cleaning supplies.
Working with Professionals
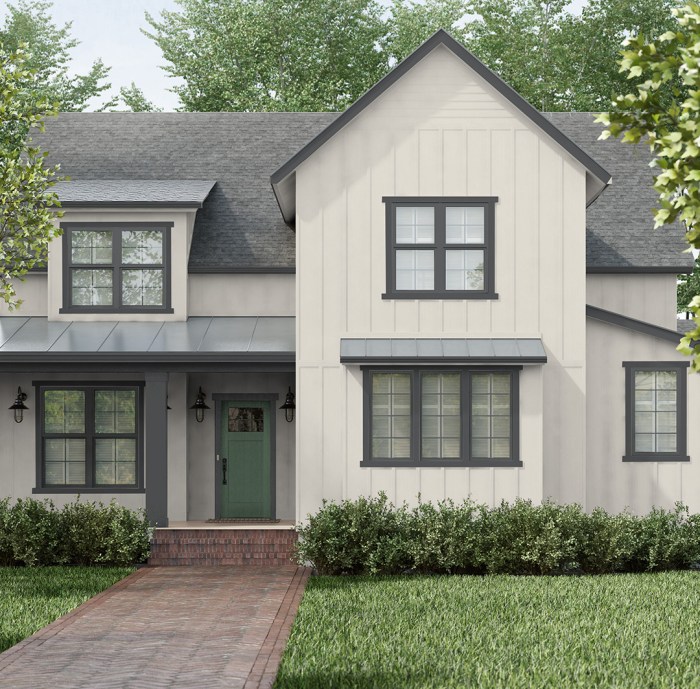
Source: behr.com
Painting your home’s exterior is a significant investment, and choosing the right contractor can make all the difference between a beautiful, long-lasting finish and a costly headache. This section will guide you through the process of selecting a reputable professional and navigating the business aspects of the project.Hiring a professional painter offers several advantages: expertise in surface preparation and paint application, access to high-quality materials, and insurance coverage for unforeseen incidents.
While DIY projects can be appealing, professional painters possess the skills and experience to ensure a superior, durable finish that protects your home’s exterior for years to come. Their efficiency can also save you valuable time and effort.
Selecting a Reputable Exterior Painting Contractor
Finding a trustworthy contractor involves thorough research and careful consideration. Begin by asking for referrals from friends, family, and neighbors who have recently had their homes painted. Online reviews on sites like Yelp or Angie’s List can also provide valuable insights into a contractor’s reputation and work quality. Check the Better Business Bureau (BBB) website for any complaints or unresolved issues.
Finally, always verify the contractor’s license and insurance.
Thinking about sprucing up your home’s exterior? Our guide on Exterior House Painting Services A Comprehensive Guide covers everything from color selection to choosing the right paint. Remember, curb appeal is key, and that extends beyond the paint job; check out this guide on Professional Landscaping Services A Comprehensive Guide for ideas to complement your fresh paint.
A well-maintained lawn and vibrant landscaping can really make your newly painted house shine!
Obtaining Accurate Quotes and Understanding Contracts
Before committing to a contractor, obtain at least three detailed written quotes. These quotes should specify the scope of work, including surface preparation, materials used (brand and type of paint), and the number of coats. A reputable contractor will provide a breakdown of labor and material costs. Carefully review the contract before signing, ensuring it includes a clear description of the project, payment schedule, start and completion dates, and a warranty on the workmanship.
Be wary of unusually low bids, as they may indicate a compromise on quality or materials. For example, a quote that’s significantly lower than others might mean the contractor is using inferior paint or cutting corners on preparation.
The Importance of Insurance and Licensing for Painting Contractors
Insurance and licensing are crucial for protecting both you and the contractor. General liability insurance covers accidents or damage that might occur during the project, while workers’ compensation insurance protects the contractor’s employees in case of on-the-job injuries. Licensing ensures the contractor meets specific standards of professionalism and competency. Always request proof of insurance and verify the contractor’s license with your local licensing board.
This protects you from potential liability should an accident occur or if the work is not performed to the agreed-upon standards. A contractor without proper insurance could leave you financially responsible for any damages or injuries.
Maintaining Your Exterior Paint Job
A well-maintained exterior paint job not only enhances your home’s curb appeal but also protects it from the elements. Regular cleaning and prompt attention to minor issues can significantly extend the life of your paint and save you money on costly repairs down the line. Proactive maintenance is key to preserving your investment.Regular cleaning is the cornerstone of exterior paint maintenance.
Dirt, mildew, and other debris can gradually damage your paint, leading to premature fading and deterioration. Different cleaning methods are suitable for various surfaces and paint types.
Exterior Paint Cleaning Methods
Effective cleaning involves a combination of gentle scrubbing and the appropriate cleaning solution. For most surfaces, a solution of mild detergent and water is sufficient. Apply the solution using a soft-bristled brush or a low-pressure sprayer, scrubbing gently to avoid damaging the paint. Rinse thoroughly with clean water afterward. For tougher stains like mildew, a solution of bleach and water (always following product instructions carefully) may be necessary, but test it in an inconspicuous area first to ensure it doesn’t damage the paint.
Power washing can be effective but should be used cautiously, as high pressure can damage delicate surfaces or remove paint. A professional power washing service is often the best option to avoid problems. Always allow the surface to dry completely before applying any treatments or sealants.
Identifying and Addressing Common Paint Problems
Peeling, cracking, and fading are common signs of paint deterioration. Peeling paint often indicates poor adhesion, possibly due to inadequate surface preparation before painting or the use of an inappropriate paint type. Cracking suggests the paint film has become brittle, possibly due to age, exposure to extreme temperatures, or underlying structural issues. Fading is usually caused by prolonged sun exposure.
Addressing these problems requires careful evaluation. Peeling paint must be completely removed before repainting. Cracks may require filling with caulk or patching compound before repainting. Faded paint might need a fresh coat or a touch-up. In cases of extensive damage, professional assistance may be required.
For example, significant cracking could indicate underlying wood rot, requiring repairs beyond simple repainting.
Exterior Paint Maintenance Schedule
A regular maintenance schedule will help you catch minor problems before they become major ones. This schedule is a guideline and may need adjustment based on your climate and the type of paint used.
- Annual Inspection: A thorough visual inspection of your home’s exterior should be performed at least once a year, preferably in spring or fall, to identify any areas of concern, such as peeling, cracking, or fading. This is a great time to assess any damage from extreme weather.
- Bi-annual Cleaning: Clean your home’s exterior twice a year, ideally in spring and fall, using appropriate cleaning methods as described above. This helps remove dirt, mildew, and other contaminants that can damage your paint.
- Five-Year Re-evaluation: After approximately five years, a more comprehensive evaluation of your paint job is recommended. This may involve a professional inspection to determine if repainting or other maintenance is necessary. This timeframe can vary depending on the climate and the quality of the initial paint job.
Cost Considerations and Budgeting: Exterior House Painting Services A Comprehensive Guide
Exterior house painting can be a significant investment, but understanding the cost breakdown helps you plan effectively and avoid unexpected expenses. Several factors influence the final price, and a well-prepared budget ensures a smooth and financially responsible project.Painting your home’s exterior involves more than just the cost of paint. Labor, preparation, and materials all contribute to the total expense.
Accurately estimating these costs is crucial for managing your budget and avoiding financial surprises. This section provides a detailed breakdown of typical costs and factors that affect them.
Typical Cost Breakdown for Exterior House Painting
The cost of exterior house painting varies greatly depending on several factors. A typical breakdown includes the cost of labor, materials (paint, primer, etc.), surface preparation, and any additional services like power washing or repairs. For a medium-sized, single-story house (approximately 1,500-2,000 square feet), expect to pay anywhere from $2,000 to $6,000 or more, depending on the specifics mentioned below.
This range reflects the variability in project size, complexity, and location.
Factors Influencing the Overall Cost
Several factors significantly impact the final cost of your exterior house painting project. These factors should be considered when creating your budget.
- House Size: Larger houses naturally require more paint and labor, leading to higher costs. A 3,000 square foot house will cost considerably more than a 1,000 square foot house.
- Paint Type and Quality: High-quality paints, such as those with longer warranties and better UV protection, cost more but often last longer, reducing long-term expenses. Choosing a less expensive paint might seem cost-effective initially but could require repainting sooner.
- Number of Coats: The number of coats needed depends on the existing paint condition and the desired finish. More coats naturally increase the cost of both paint and labor.
- Surface Preparation: Extensive surface preparation, such as repairing damaged wood, scraping old paint, or power washing, adds to the overall cost. The condition of your existing exterior significantly impacts preparation time and expenses.
- Labor Costs: Labor costs vary by region and the painter’s experience. Experienced painters generally charge more per hour or per square foot than less experienced ones.
- Complexity of the House: Houses with intricate designs, multiple stories, or hard-to-reach areas require more time and effort, increasing the labor cost.
- Additional Services: Additional services, such as caulking, gutter cleaning, or window washing, increase the overall project cost. These services are often bundled with the painting project for convenience.
Sample Budget for an Exterior Painting Project
Creating a realistic budget is essential for managing your finances. The following example provides a basic framework; adjust it based on your specific project requirements.
| Item | Estimated Cost |
|---|---|
| Labor (Painter’s fees) | $2,500 – $4,000 |
| Paint (High-quality exterior paint) | $500 – $1,000 |
| Primer | $100 – $200 |
| Surface Preparation (Power washing, scraping, caulking) | $300 – $500 |
| Miscellaneous (Tape, brushes, rollers, etc.) | $100 – $200 |
| Total Estimated Cost | $3,500 – $6,000 |
Note: This is a sample budget and may not reflect the actual cost of your project. Obtain multiple quotes from reputable painters to get a more accurate estimate. Always factor in a contingency of 10-15% to account for unforeseen expenses.
Illustrative Examples of Exterior Painting Projects
This section details three diverse exterior house painting projects, highlighting the unique challenges and solutions involved in each. We’ll examine the house styles, paint selections, preparation methods, painting techniques, and the final results, offering practical insights for your own projects.
Victorian Era Home with Intricate Trim, Exterior House Painting Services A Comprehensive Guide
This project involved a large Victorian-era home featuring intricate woodwork, multiple gables, and a variety of architectural details. The existing paint was severely weathered and peeling, requiring extensive preparation. The surface preparation involved meticulous scraping of loose paint, caulking of cracks and gaps, and priming of bare wood and previously painted surfaces. The extensive trim work demanded careful masking and attention to detail.
The chosen paint was a high-quality, exterior-grade acrylic paint in a classic, deep red with off-white trim. This color scheme enhanced the home’s architectural features and created a striking contrast. The final result was a beautifully restored Victorian home that showcased its intricate details and charm. The painting technique employed involved a combination of brushwork for the intricate trim and a roller for the larger surfaces, ensuring a smooth, even finish.
Modern Ranch Style Home with Stucco Exterior
This project featured a modern ranch-style home with a stucco exterior. The stucco was in relatively good condition but required cleaning to remove dirt and mildew. Power washing was used cautiously to avoid damaging the stucco surface. Minor repairs were made to small cracks and imperfections before priming. A light-colored, neutral-toned paint was chosen to reflect sunlight and keep the home cool.
The paint was a high-quality acrylic stucco paint formulated for excellent adhesion and durability. The painting technique utilized a sprayer for efficient coverage of the large, flat surfaces, followed by hand-brushing of the trim and smaller details. The final result was a clean, modern look that highlighted the home’s architectural simplicity. The light color choice created a bright and inviting atmosphere.
Craftsman Bungalow with Cedar Siding
This project involved a Craftsman-style bungalow with cedar siding. The cedar siding required careful preparation to ensure proper paint adhesion. The surface was cleaned with a pressure washer to remove dirt and debris. Any damaged or rotting siding was replaced before proceeding. A penetrating oil-based primer was applied to seal the wood and provide a suitable base for the topcoat.
The chosen paint was a high-quality, exterior-grade acrylic paint in a natural, earthy tone that complemented the home’s style. The painting technique involved using a brush for applying the paint to the individual cedar planks, which ensured that each plank was thoroughly coated. The final result was a beautifully restored Craftsman bungalow with a rich, natural look that enhanced the home’s rustic charm.
The choice of a natural tone maintained the character of the cedar siding while providing protection from the elements.
Our guide on Exterior House Painting Services A Comprehensive Guide covers everything from color selection to prep work. Once your paint job is complete, consider enhancing your home’s curb appeal further by installing stylish outdoor lighting; check out this helpful resource on Exterior Lighting Solutions Illuminating Your World for ideas. Back to painting, remember proper surface preparation is key for a long-lasting finish!
Safety Precautions During Exterior House Painting
Exterior house painting, whether a DIY project or a professional undertaking, presents several potential hazards. Prioritizing safety is crucial to prevent accidents and ensure a successful painting job. This section Artikels essential safety measures for both professionals and homeowners. Following these guidelines will minimize risks and protect your health and well-being.
Safety precautions are paramount throughout the entire painting process, from preparation to cleanup. Neglecting safety can lead to serious injuries, including falls, electric shocks, chemical burns, and respiratory problems. Therefore, a comprehensive understanding of potential risks and appropriate safety measures is essential.
Personal Protective Equipment (PPE)
Appropriate personal protective equipment is vital for minimizing exposure to hazards. This includes items designed to safeguard different parts of the body from various risks. The selection of PPE should depend on the specific tasks and materials being used.
- Eye Protection: Safety glasses or goggles are essential to protect your eyes from paint splashes, dust, and debris. Consider using goggles with side shields for enhanced protection.
- Respiratory Protection: A respirator mask, preferably an N95 or better, is crucial when working with paints, solvents, and other potentially harmful chemicals. This protects against inhaling paint fumes and dust particles.
- Gloves: Wear chemical-resistant gloves to protect your hands from paint, solvents, and cleaning agents. Choose gloves appropriate for the specific chemicals you are using.
- Clothing: Wear long sleeves, long pants, and closed-toe shoes to protect your skin from paint and other materials. Avoid wearing loose clothing that could get caught in equipment.
- Head Protection: A hard hat is recommended, especially when working at heights or near overhead hazards.
Working at Heights
Painting a house often involves working at heights, which poses significant risks. Appropriate safety measures are critical to prevent falls.
- Secure Ladders and Scaffolding: Always use stable and properly secured ladders or scaffolding. Ensure that the base is level and that the ladder is leaning at the correct angle. Never overreach while on a ladder.
- Safety Harness: For significant heights, a safety harness and fall arrest system are essential. This will prevent serious injury in case of a fall.
- Spotter: When working at heights, it’s advisable to have a spotter to assist and ensure safety.
Electrical Hazards
Electrical hazards are a significant concern, especially when working near power lines or electrical outlets.
- Power Line Clearance: Maintain a safe distance from power lines. Never work near power lines without proper training and safety equipment.
- GFCI Outlets: Use Ground Fault Circuit Interrupter (GFCI) protected outlets to prevent electrical shocks.
- Avoid Contact with Wet Surfaces: Avoid contact with wet surfaces while working with electricity.
Chemical Hazards
Paints, solvents, and other painting materials contain chemicals that can be harmful if mishandled.
- Proper Ventilation: Ensure adequate ventilation to prevent the buildup of harmful fumes. Work outdoors whenever possible or use fans to circulate air.
- Chemical Safety Data Sheets (SDS): Review the SDS for all chemicals used to understand their hazards and proper handling procedures.
- Spill Cleanup: Have a plan for cleaning up spills immediately and safely.
Fire Hazards
Certain painting materials are flammable, so fire safety precautions are necessary.
- Flammable Materials Storage: Store flammable materials in a safe, well-ventilated area away from ignition sources.
- No Smoking: Strictly prohibit smoking near flammable materials.
- Fire Extinguisher: Have a fire extinguisher readily available and know how to use it.
Last Recap
Painting your home’s exterior is a significant undertaking, but with careful planning and the right information, you can achieve a beautiful and long-lasting result. Remember, whether you choose to tackle the project yourself or hire professionals, preparation is key. By understanding the different paint types, techniques, and safety precautions, you can confidently navigate the process and enjoy the stunning transformation of your home.
This guide has provided a comprehensive overview to help you achieve the perfect exterior finish, enhancing both the beauty and value of your property for years to come. Now go forth and paint!
FAQ Explained
What’s the best time of year to paint my house exterior?
Generally, spring or fall offer ideal temperatures for exterior painting. Avoid extreme heat or cold for optimal paint adhesion and drying.
How long does exterior house painting typically take?
The time required varies significantly based on house size, surface condition, and the number of painters. Expect a few days to several weeks for larger projects.
Can I use the same paint for all exterior surfaces (wood, brick, stucco)?
No, different surfaces require specific paint types. Wood siding may need a different paint than brick or stucco. Consult a paint professional for recommendations.
How often should I repaint my house exterior?
This depends on factors like paint quality, weather conditions, and surface type. A good quality paint job can last 5-10 years, but regular maintenance is crucial.
What should I do if I find mold or mildew on my exterior walls before painting?
Thoroughly clean the affected areas with a suitable mildew remover before painting to prevent the problem from recurring.

